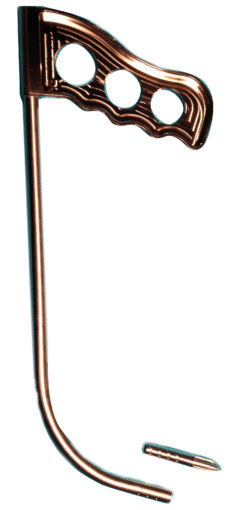
Trans-Urethral Supra-Pubic Tube Guide (TUSP)
The TUSP was designed by Steven Ochs, a practicing urologist with Urology One in Canton, Ohio.
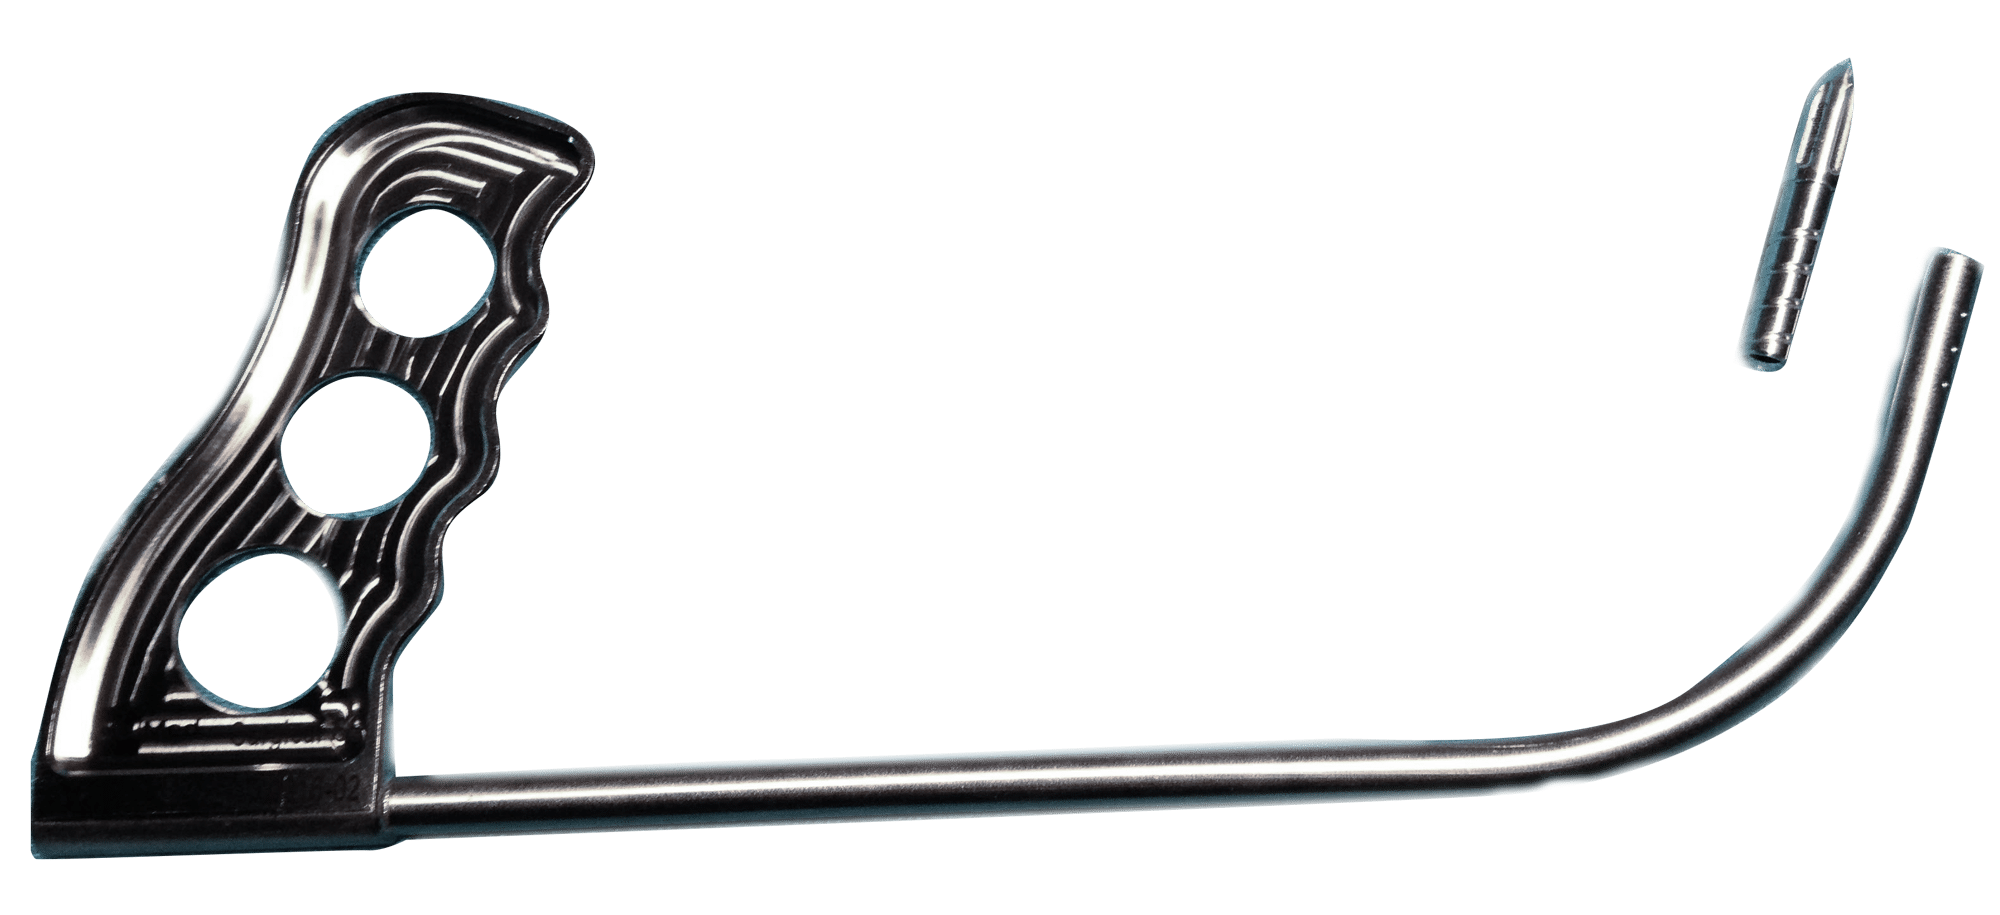
Trans-Urethral Supra-Pubic Tube Guide – The TUSP is a reusable surgical tool designed to assist the urologist in placing suprapubic tubes using the retrograde technique. It addresses the shortcoming of the Lowsley retractor to provide a safer and more efficient placement of the suprapubic tube. The TUSP features a hollow shaft that will allow the passage of up to an 18F Foley following the removal of its cannulated end piece.
Dr. Mooreville is available to answer by email or a telephone conversation can be scheduled.
uramix@comcast.net
+1 610.394.9850
Key Benefits
Easy to use, minimally invasive, retrograde approach when antegrade approach not feasible.
Method of Use
Method of Use
Features Overview
Surgical Stainless Steel
Sterilizable, reusable
a patent-pending “soft dimple-thread," which permits the smallest size cannula (23.8 Fr) to be used with the largest sized catheter (21.5 Fr)
Pricing
$1,799 per unit
$50 for shipping
SKU # 2201
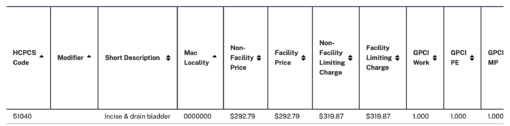
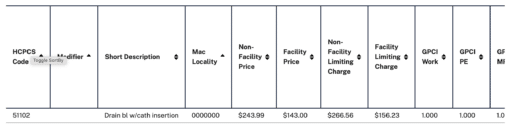
Retrograde incisional placement of SPT has higher RVU’s than punch type placement. Uramix does not endorse any particular code for billing purposes. These codes are only provided for information purposes.
1,2,3 cms.gov
place an order
Fill out the information required and we will be in touch to continue the order process.